How To Use The PSDCovers Panel v1.1.x
Introduction
We have recently made changes to our workflow and how we create mockups. The process we have been using for over 5 years is now entirely replaced. If you are an existing user of PSDCovers then you’ll be happy to learn that our new workflow does not affect how you use our panel. In fact, we worked very hard to keep the changes to the PSDCovers panel down to a bare minimum — you can expect to invest 2 minutes learning the new panel.Contents
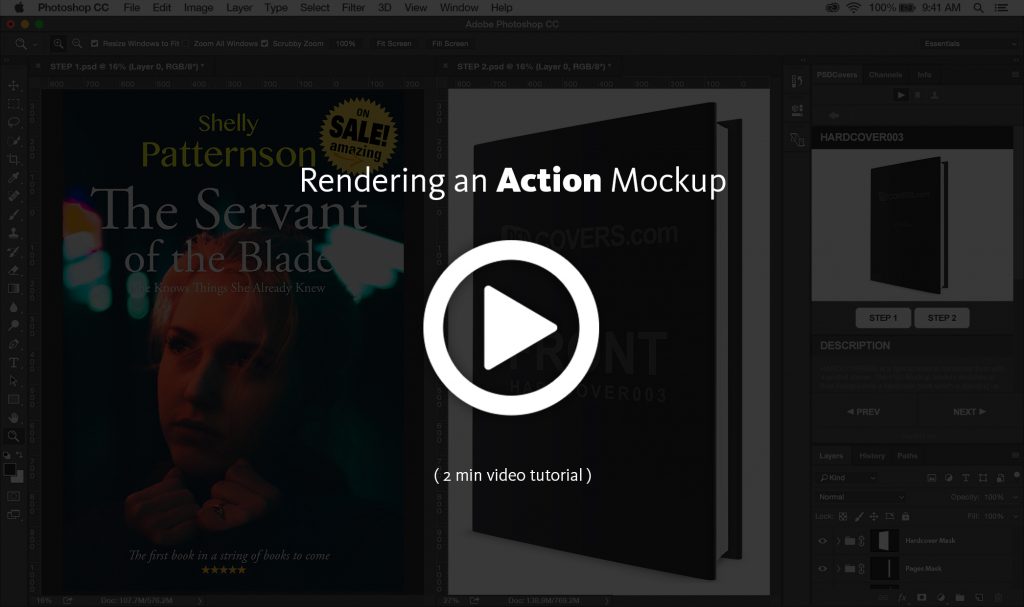
The following tutorial includes instructions for rendering mockups using our Action Mockups as well as our newer AR Mockups process. Use the links from the Table of Contents listed along the right edge of your browser to dig into specific sections of this tutorial. To jump directly to AR Mockups or Action Mockups you may use the following links:Panel Activation & Account Creation
Using the PSDCovers panel does not require an account to access most of our free mockups. However, please note that this tutorial is written from the point of view of someone who is logged in. If you do not have the PSDCovers panel installed, or have not created a free account, please review our getting started tutorial.Tutorial Assets
Source Mockups
Sample Download
Overview
Accessing the PSDCovers Panel
Accessing the panel is still done through the Extension menu in Photoshop.
Product Mockup Catalogs
The panel’s default startup mode is to open the product mockup catalogue page. The product mockup catalogue offers a high-level view of both types of mockups the panel currently supports: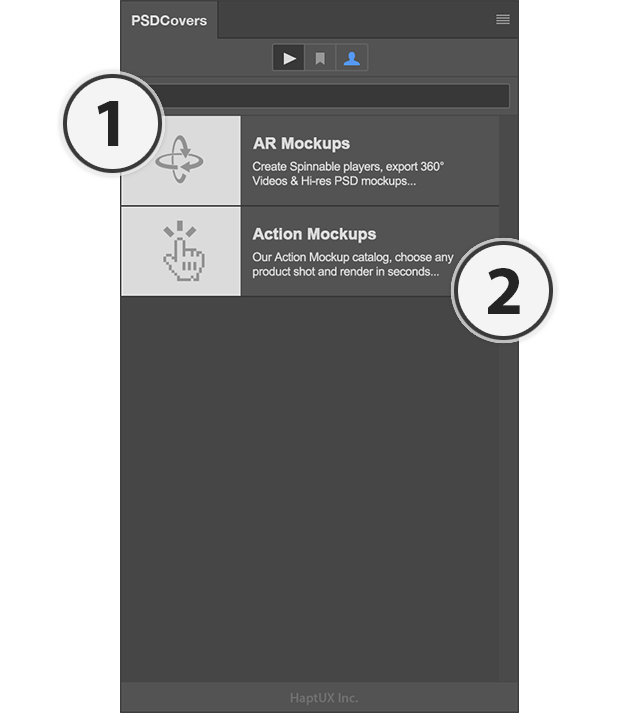
Product Search
Finding mockups across both catalog sets is easy: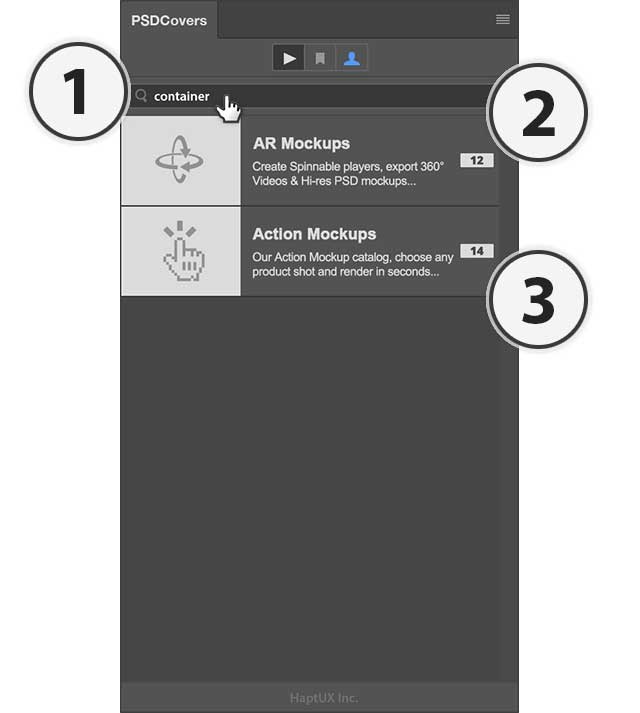
Action Mockups
Viewing The Action Mockups Catalog
To render a product mockup in the Action Mockups catalog we first need to select Action Mockup from the product mockup catalog.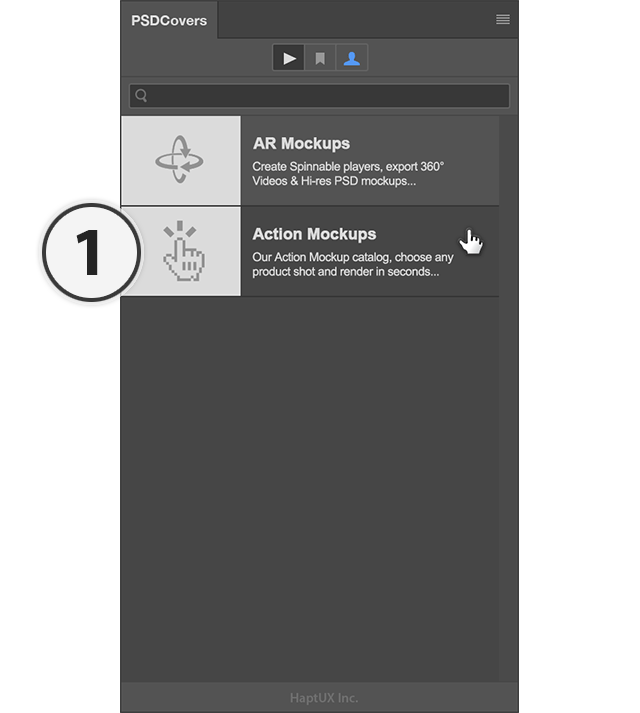
Action Mockups Product List
Selecting Action Mockups loads up our classic product list which contains close to 400 mockups.
Viewing the Mockup Details Page
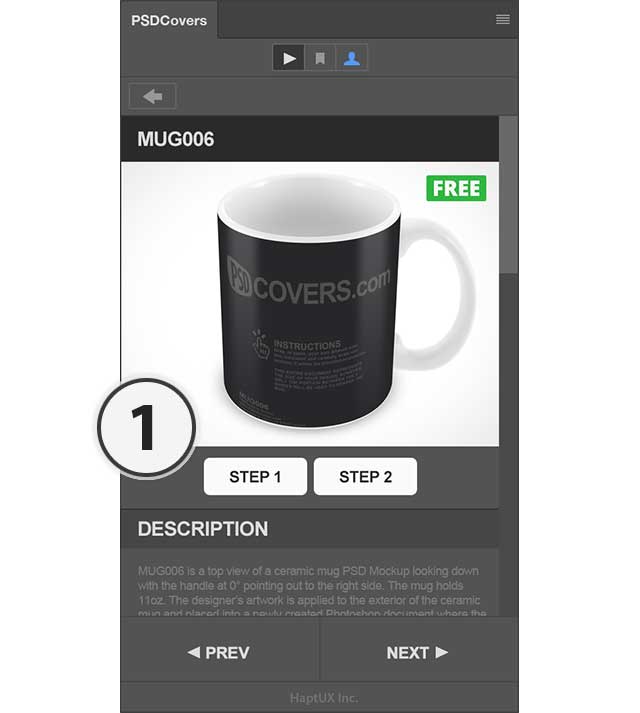
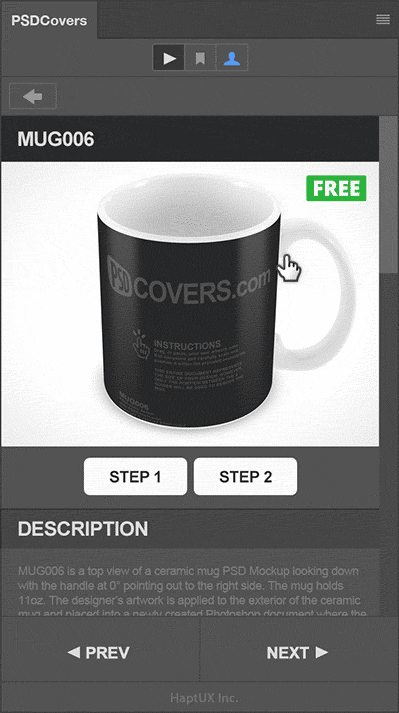
Selecting an Action Mockup from the list brings you to the Details Page for that product mockup. For this tutorial we will be rendering MUG006. To view a mockup’s Details Page…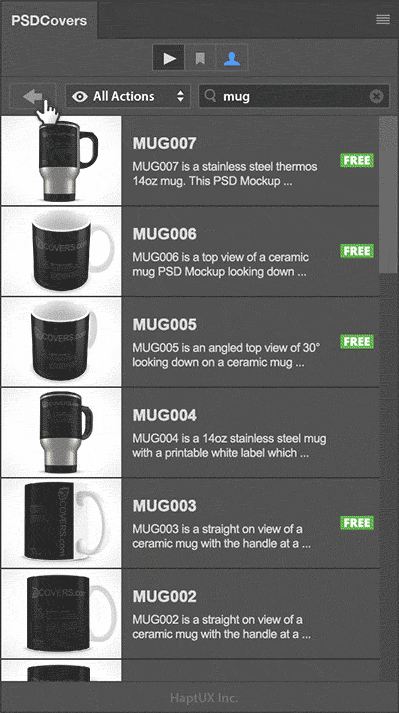
About FREE Mockups
Action Mockups which are labelled FREE and wrapped with a green outline do not require an account and can be rendered by anyone.The Details Page Overview
The Details Page contains the same information as visiting the website while also being responsible for creating the template and final render for your product. Each Details Page features the following components:- Product description
- Social media tools (not seen here)
- Navigation tools
- Back button to return to the catalog list
Rendering An Action Mockup
Template Render Complete
Within a few seconds your MUG006 template will be ready and appears in a newly created Untitled PSD. The Layers panel will contain the various template layers.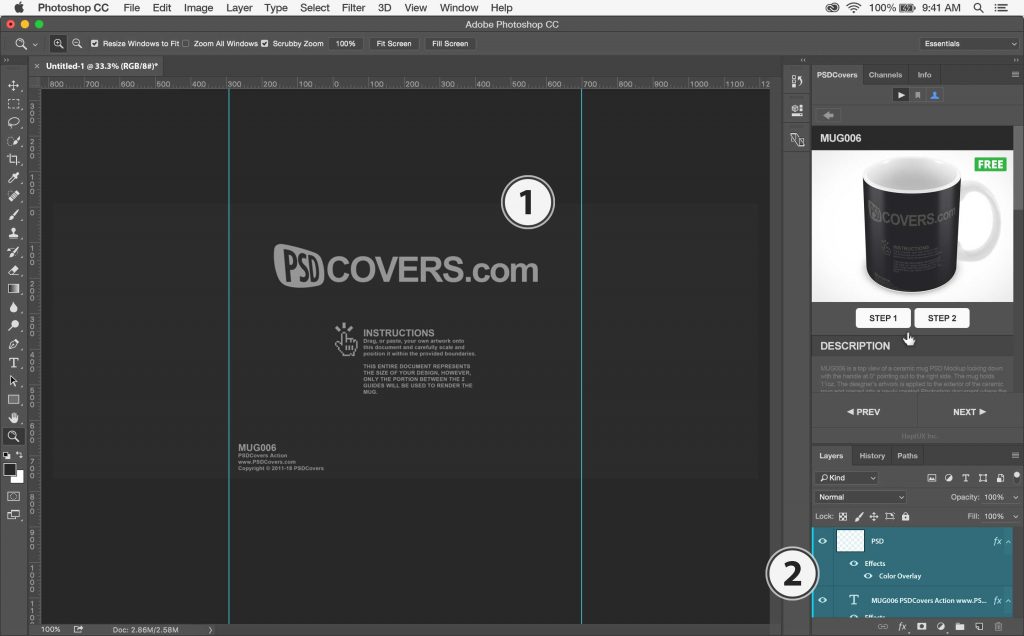
Adding Artwork To The Template
Action Mockups will typically have guides which define the area where your design should go. Your artwork can cover the entire document, but in this particular case only the portion of the design within the guides will be applied to the mug. The areas on either side of the guides represent the areas of the mug which are not currently visible — for example, the back of the cup. Not being able to rotate and spin is a limitation of Action Mockups. For spinnable mockups please see our AR Mockups section. With the template open the next step is to add your own artwork into the allocated space between the guides. Feel free to use the entire canvas area to place your artwork — if at some point in the future you wish to render a different view of the mug you can simulate it by simply shifting your design left or right so that it appears inside the guidelines.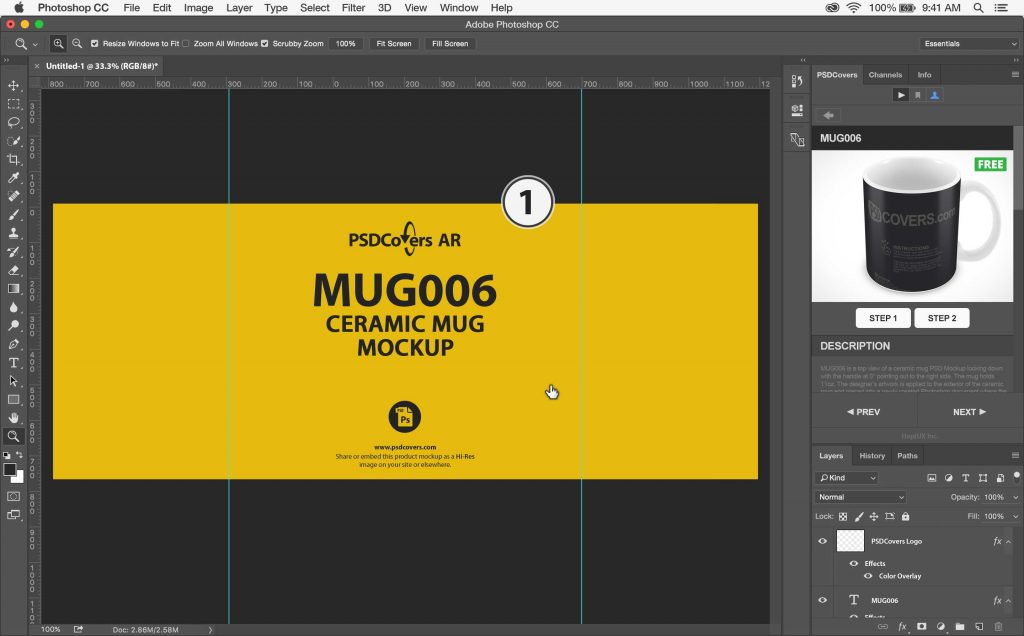
Artwork With Template Layers
Always take note to place your own artwork above the template layers generated by STEP 1. In most cases you can safely delete these. Placing your own artwork above the template layers ensures that your work renders properly.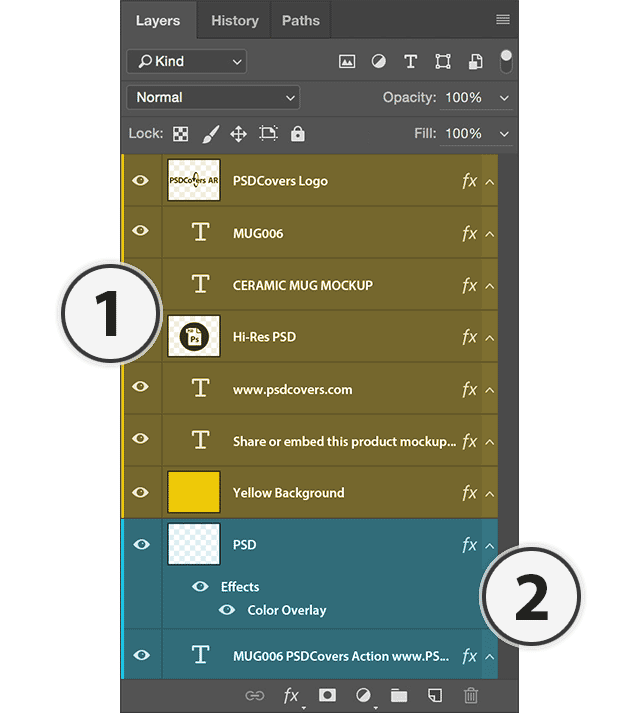
Skipping STEP 1
Once the artwork is placed in the template we can save it to the filesystem. At any point in the future you can simply open your saved template and skip directly to clicking STEP 2 to render your Action Mockup.
Rendering the Hi-Res Mockup
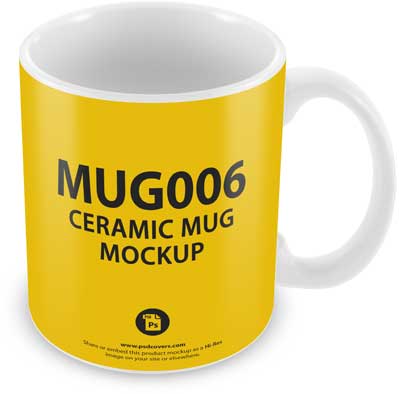
Our template is now ready to be applied to the mug. With your template the currently open, and active document, we can render the final result.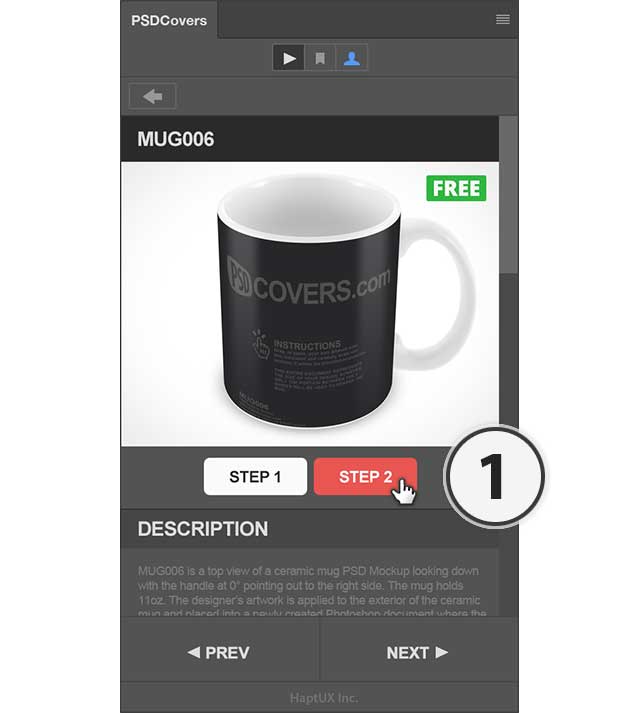 Within a minute or less your mockup is fully rendered and presented to you in a new PSD.
The Photoshop Layers panel will contain all the layers required to further modify your mockup such as customizing the background with your own colour or backdrop image.
Within a minute or less your mockup is fully rendered and presented to you in a new PSD.
The Photoshop Layers panel will contain all the layers required to further modify your mockup such as customizing the background with your own colour or backdrop image.
 At this point your mockup is done and can be saved or shared with others using the various sharing tools offered by your favourite social media outlets.
AR Mockups
On the surface an AR Mockup appears to be the same product as Action Mockups, however, there are in fact very few similarities between the two products. We have worked hard to present these new AR Mockups in the same panel using the same workflow process in order to prevent our users from having to learn an entirely new rendering process.Viewing The AR Mockups Catalog
When the PSDCovers panel is opened it will default to the product mockup catalogue page. From here we will select AR Mockups…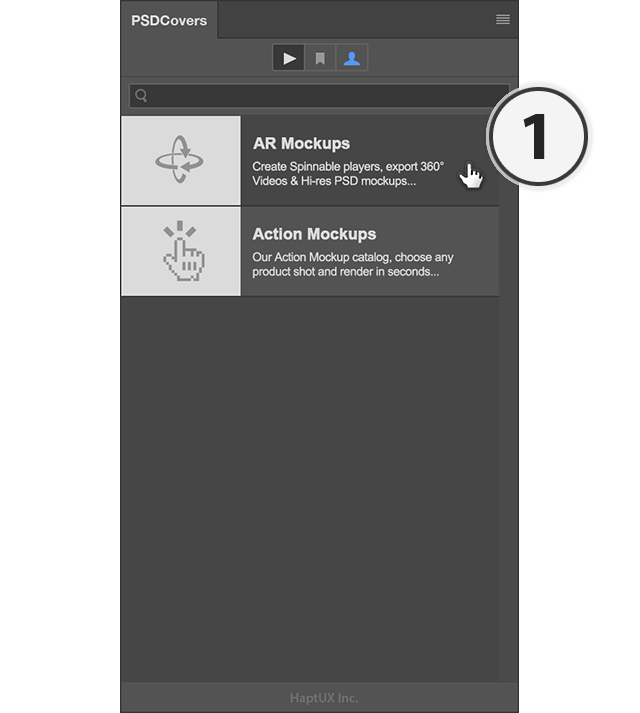
The AR Mockups Product List
The AR Mockups product list slides into view. In this section we will be rendering a common container which holds a powdered cleaning product.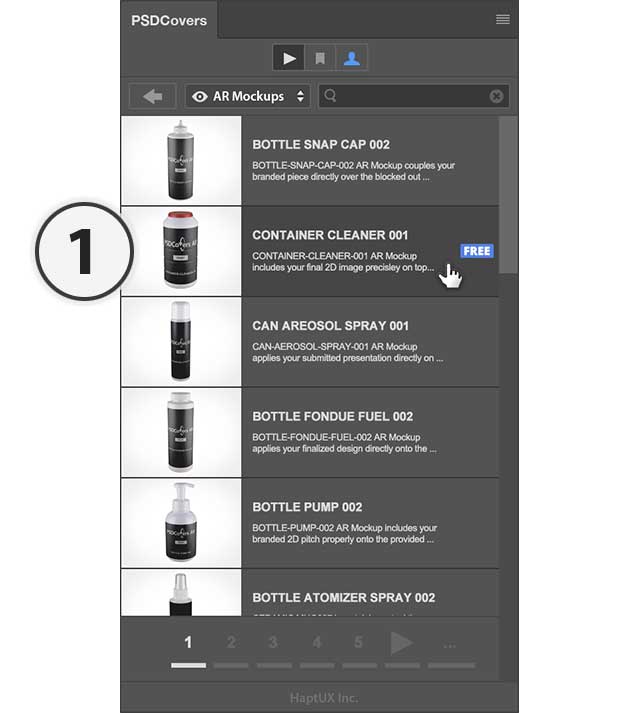
Container Cleaner Details Page
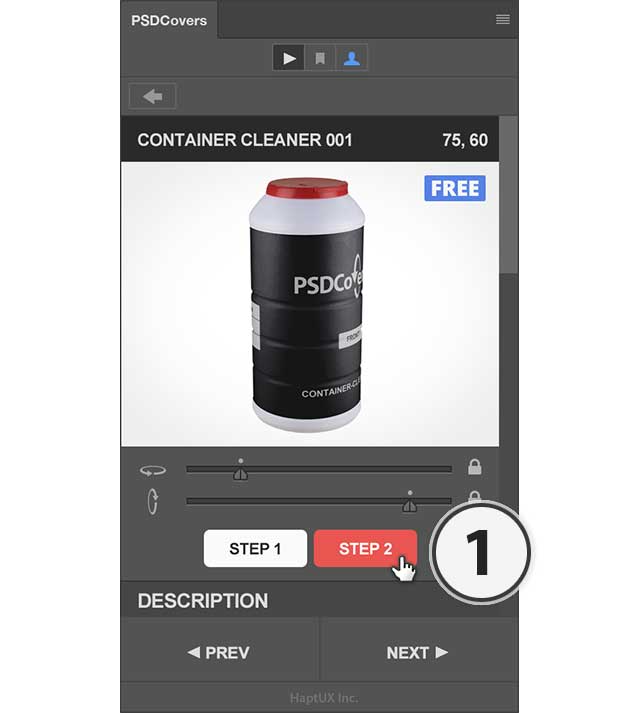
Selecting CONTAINER CLEANER 001 from the AR Mockup product list brings you to the Details Page.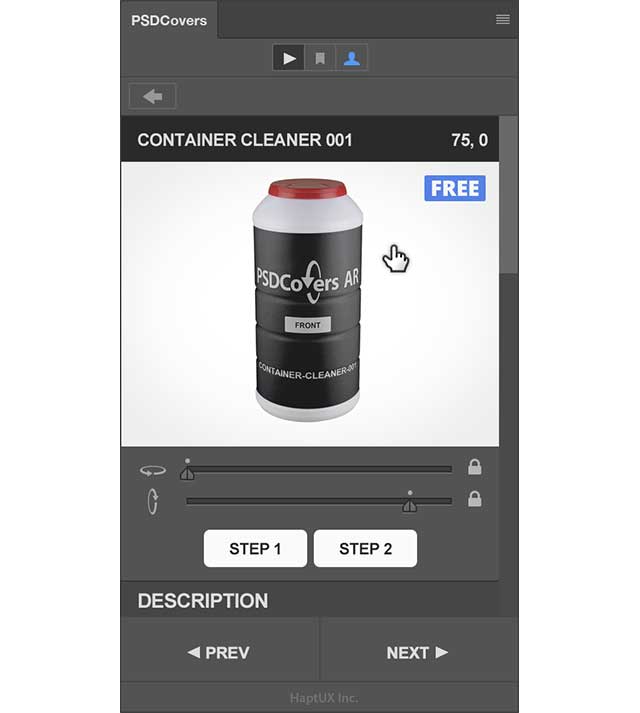
Draggable Mockup Preview
Every Details Page for an AR Mockup displays a large preview of the chosen mockup. If you are an existing user of the PSDCovers panel then the Details page looks exactly the same other than the range sliders below the preview. One easily overlooked feature of the AR Mockups Details Page is the ability to drag the preview to rotate the mockup to the desired position.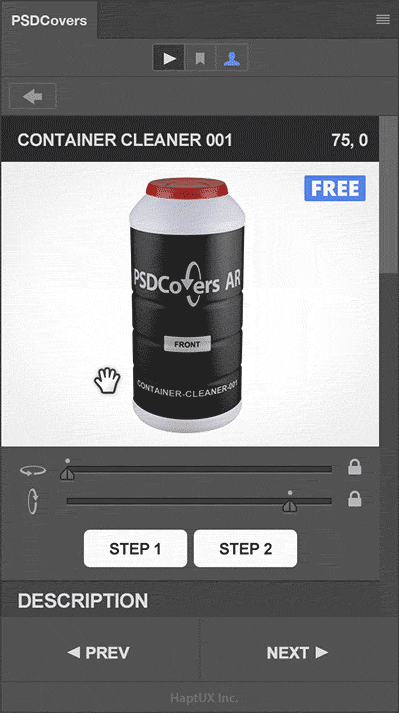
Position Updates
As the cursor is dragged left to right the position details are updated to the right of the product name. Also, the Range Slider’s position is automatically updated to reflect the position of the current view.Range Sliders
As an alternative method to dragging the preview to select the desired angle to render, you may also use the Range Slider to selectively rotate or spin along the horizontal or vertical axis. Below the range sliders are 2 additional buttons labelled STEP 1 and STEP 2. These buttons perform the exact same functions in both Action Mockups and AR Mockups. If you have used the PSDCovers panel at anytime in the last 5 years, then you know how these buttons work.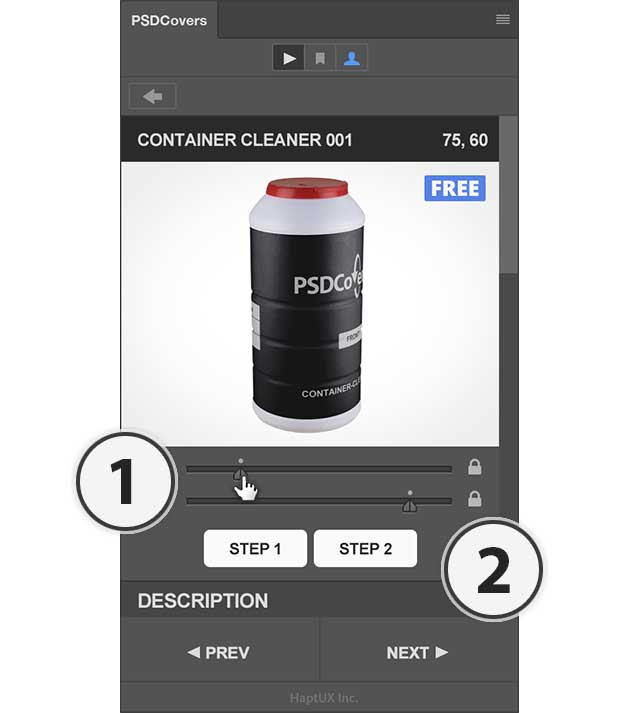
Preparing the AR Template
Once you have selected a preferred product angle to render you’ll need to render the product’s template.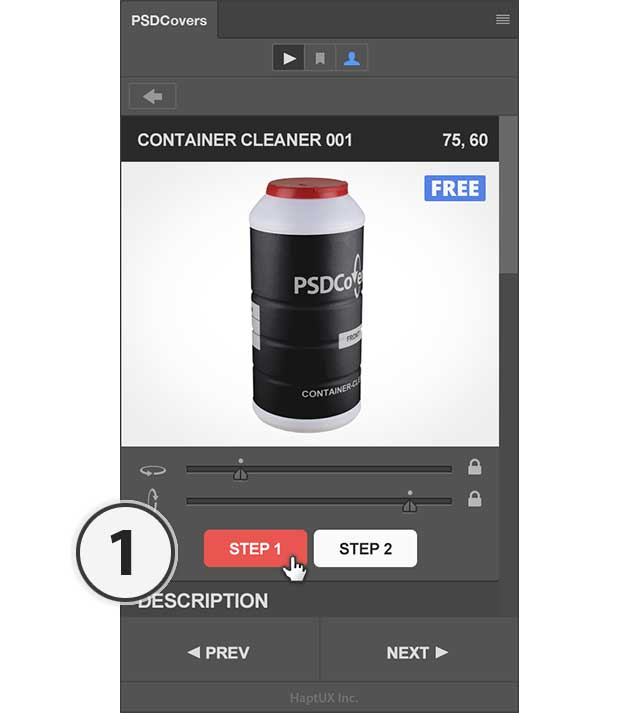
AR Template Render Complete
The time required for generating a template for any product mockup is just a few seconds. The primary use for the default template is to test rendering right away. If you were to click STEP 2 right now you’d see the template applied to the mockup which can help give you an idea of how your own design will be applied to the product.
Universal Grid
For AR Mockups we’ve updated how we generate the template — it’s now parametric. In short, we’re able to render a grid that correlates to the to the size of the product. For example, each AR product is rendered with a faint grid in the background. The grid is comprised of small and large grids — each individual grid represents 2mm while each group of 5 represents 1cm. Having the grid on the label match the real-world label dimensions is helpful when you want to place 2 or more AR product mockups together in a single layout. In the past you had to guess how big one product was when placed next to another product. With AR Mockups, you simply scale the products until their grid sizes match, once they do you know you’ve nailed the aspect ratio between the two.
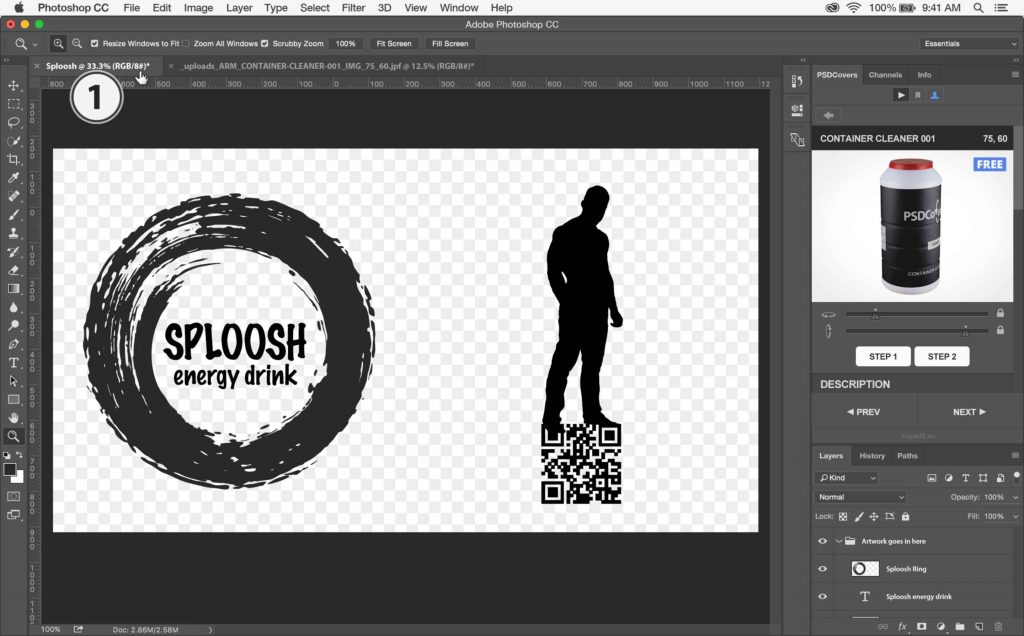
Adding Artwork to Template
Using the template as our guide, we can place our artwork for the front and back of the product accordingly.
Transparency Supported
The AR Mockup workflow was designed to support fully transparent backgrounds in your layout. Once the design above is rendered to the product it will appear as if the ink was printed directly onto the product. The material of the AR Mockup will be readily visible wherever transparency is found in the design.Save Your Work
PSDCovers fully supports reusing existing designs — that is to say, you do not need to run STEP 1 in the future. If you plan on using this design again for this AR Mokcup in the future you can simply save it normally. In the future, to render this mockup again you will only have to click on the STEP 2 button.
Template Dimensions
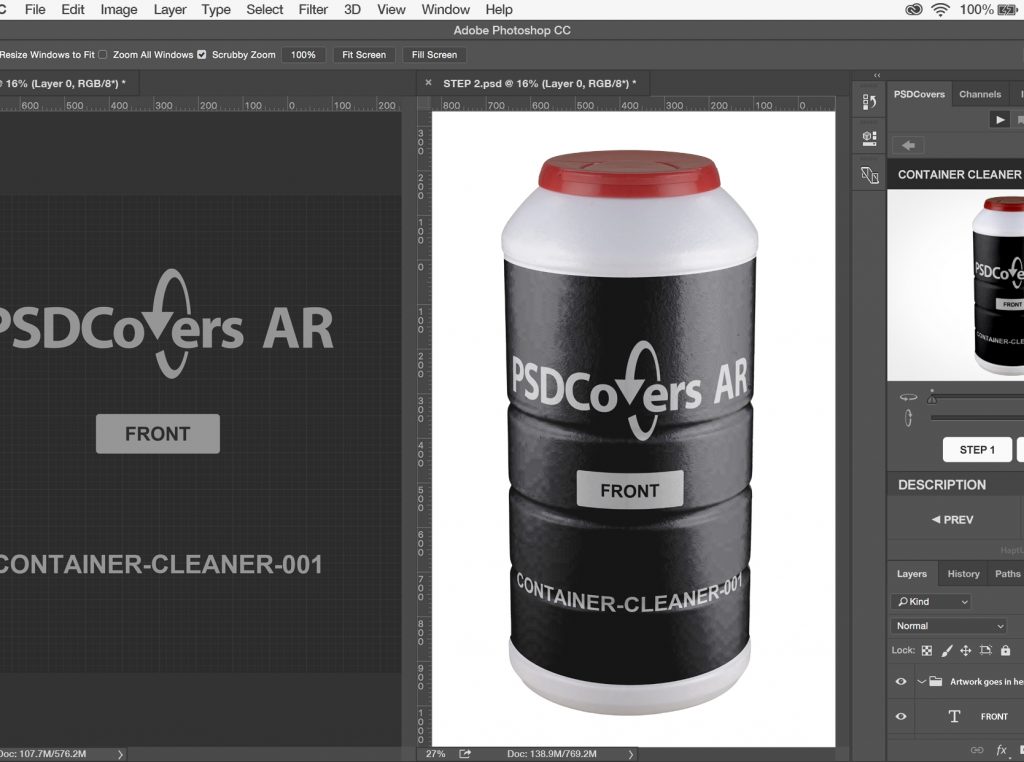
Each template is rendered at a very specific pixel width and height. In order to successfully render your designs onto an AR product you must not change the canvas dimensions. This includes cropping the canvas or scaling the entire document. Running STEP 2 with a template whose dimensions have been altered will result in an error message.AR Mockup Rendering Options
Unlike our Action Mockups which only support a single view and Hi-Res output — AR Mockups support 168 different views and 3 output options. These options are Hi-Res, Vwhileideo and Spinnable player. Additionally, each of these output options offers 5 render styles to choose from, matte, bright, semi-gloss, gloss and high-gloss. We’ll review each option and the rendered results below.Hi-Res Rendering
Select A Render Style
One of the new features in AR Mockups is to select a rendering style. If you are familiar with Photoshop then you’ll notice that what’s being referred too here as a rendering style is actually a series of layers with various layer effects applied. The applied layers effects provide the illusion that your design was printed directly onto the surface of the product. The available styles are matte, bright, semi-gloss, gloss and high-gloss. By default all the samples in the panel and on our web site are rendered using the matte style. The matte style will minimize the highlights found on the product whereas the high-gloss will exaggerate the highlights making the highlights look almost 3D rendered.
Hi-Res Result
Rendering a Hi-Res view for an AR Mockup takes the same amount of time as our Action Mockups, usually less than a minute. When complete, the Layers panel will contain multiple editable layers such as highlight layers whose brightness can be increased or decreased. Here is the final rendered design with transparency rotated to the view we selected in the panel. Our design’s transparency allows the product material to be clearly visible — in this case lots of HDPE plastic…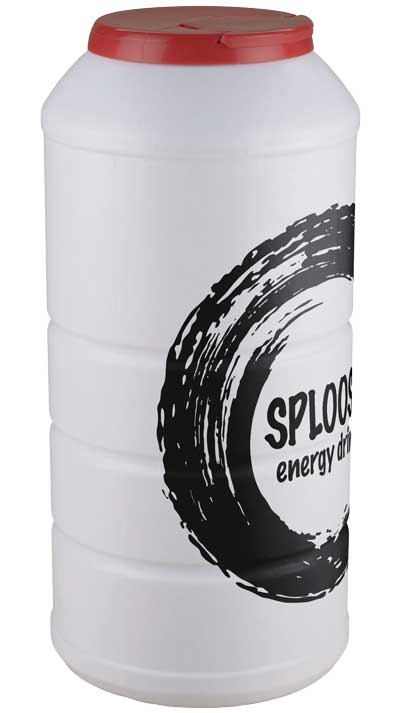
Spinnable Player Rendering

Enable Spinnable Export
The PSDCovers default behaviour is to export static Hi-Res products.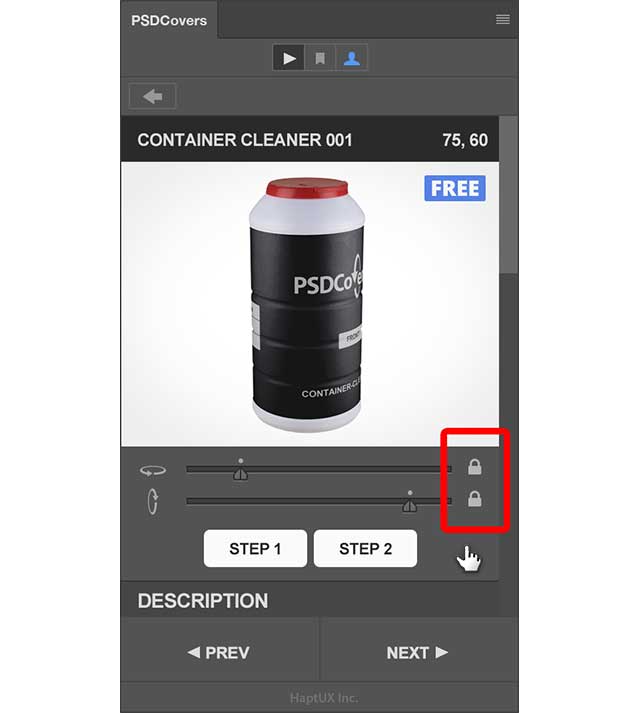 First, start by unlocking the horizontal range slider. Do this by clicking the lock icon to the right of the slider.

Define Spin Range (part 1)
Once the Range Slider is unlocked the 2 halves of the slider can be dragged independently of each other. Each half of the Range Slider defines how far the product will rotate in the exported Spinnable player. To export a full 360° Spinnable player we need to drag both halves to both ends of the Range Slider.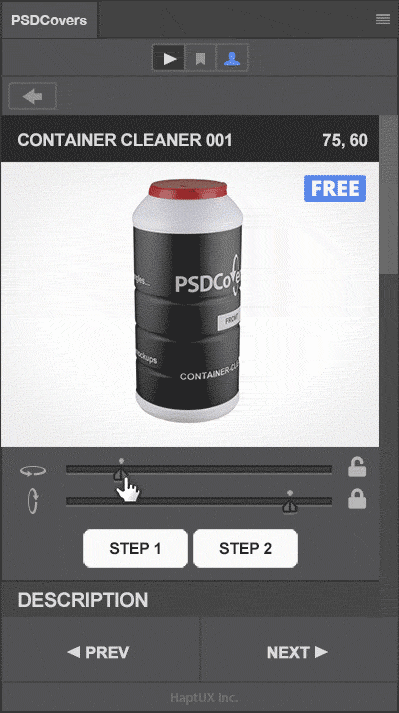
Define Spin Range (part 2)
To export a full 360° we need to drag the left half of the Range Slider to the left edge of the slide track.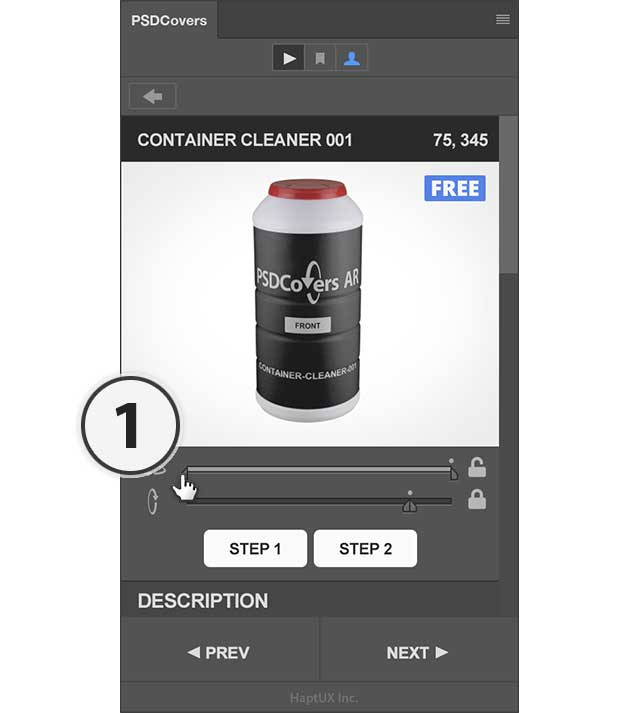
Begin Exporting Spinnable Player
The panel is now primed to export a full 360° rotation of a single horizontal axis. Specifically, this product,once exported, will rotate a full 360° at the 75° delta.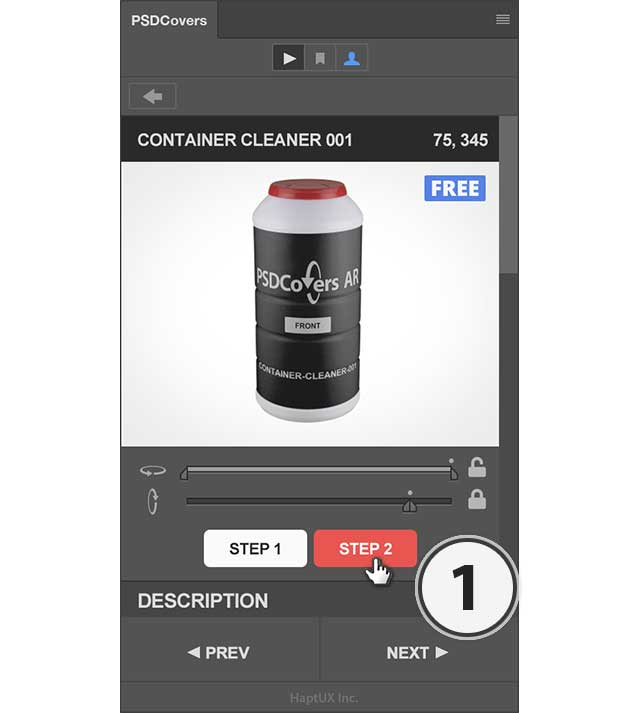 Next, select the render style, this will be applied to every view in the rotation.
In the next section we’ll be learning about video export, for now we’re going to stick to exporting a Spinnable Player.
Next, select the render style, this will be applied to every view in the rotation.
In the next section we’ll be learning about video export, for now we’re going to stick to exporting a Spinnable Player.
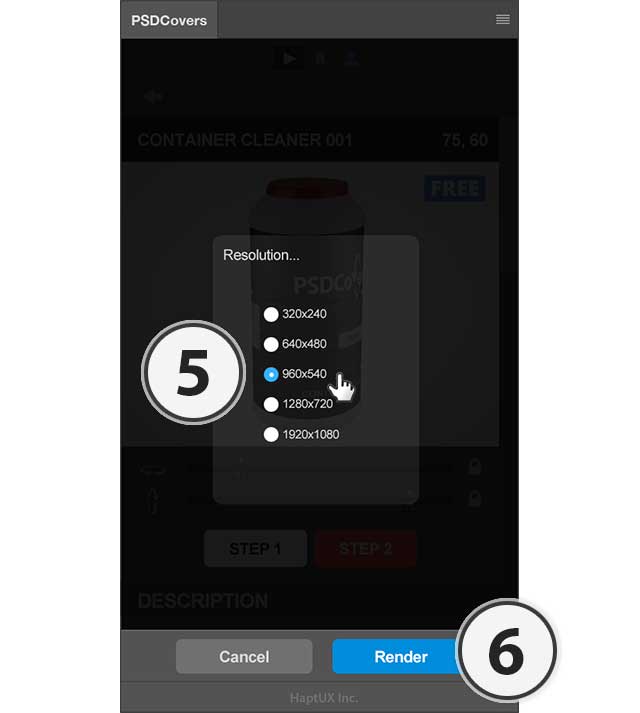
 The next step is selecting a resolution, selecting a smaller resolution will render faster. If you want to scale, crop or otherwise customize the images after the export is complete then you can export a larger resolution.
 The panel will now start the rendering process.
When rendering multiple views you can expect longer render times. Depending on your hardware this process can last anywhere from several minutes or longer. Be patient, once rendering is complete a modal will appear.
The panel will now start the rendering process.
When rendering multiple views you can expect longer render times. Depending on your hardware this process can last anywhere from several minutes or longer. Be patient, once rendering is complete a modal will appear.

DO NOT SWITCH APPS
During the render process Photoshop will be using the clipboard intensely, if you accidentally copy text or other data from another app during the render process it will cause the process to immediately fail. It’s best to allow Photoshop to complete the rendering process.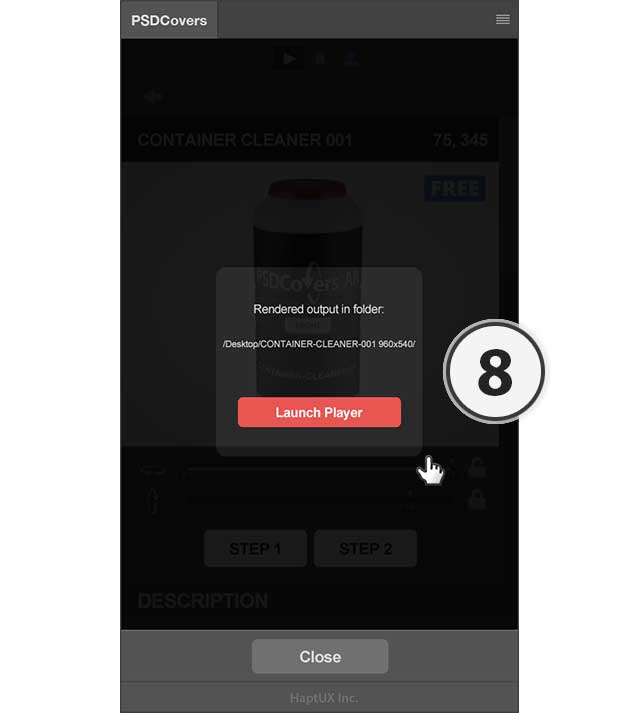
Single Plane Spinnable 360°
And here is the result… click anywhere on the following product image to initiate the AR player, then drag left or right to spin it.Where is the vertical rotation?
Notice how dragging up and down does not shift the product vertically? That’s because we used the Range Sliders to define the entire horizontal range (ie, full spin) but we left the vertical Range Slider locked at 75°. Continue reading to learn how to unlock the remaining plane angles.Increase Vertical Plane Range
In the sample above we learned how to select all the views around the x-axis of our product. However, the y-axis is locked at 75°. To export a Spinnable player with more than a single vertical plane of rotation we simply need to unlock the vertical Range Slider and select the available angles.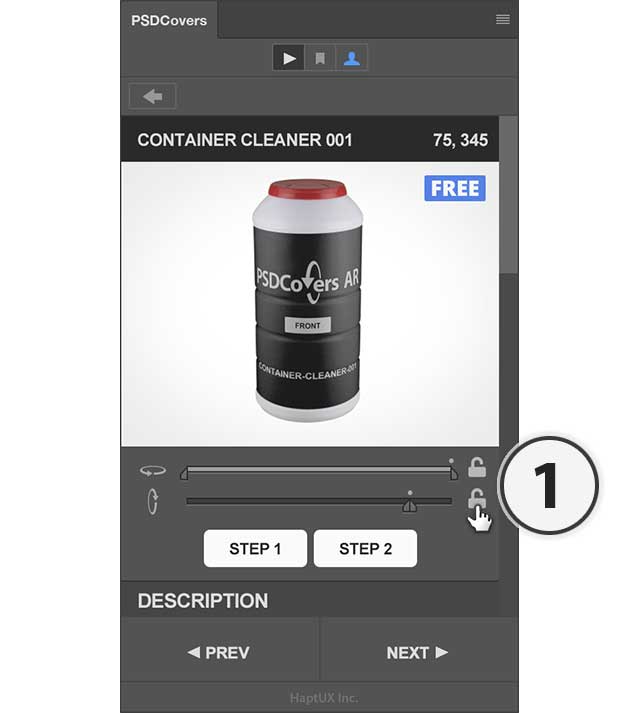
Select Entire Vertical Range
With the vertical Range Slider unlocked our next step is to select the entire range. The current possible vertical planes to export are 90° (front view), 75°, 60°, 45°, 30°, 15° and 0° (top view). Although we are choosing to export the entire vertical range from 90° to 0° you are free to select any combination which best suits your needs.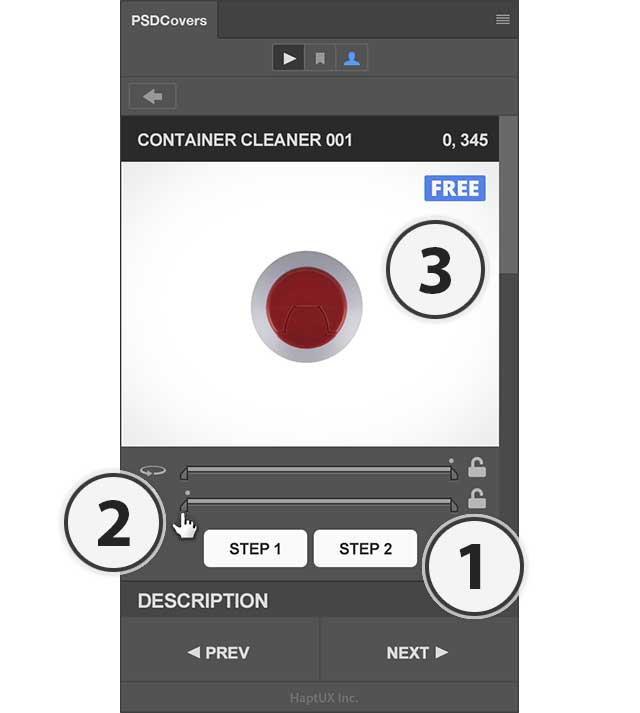
Start Position
In a future tutorial we will review how to manually edit the Spinnable Player HTML to programatically change the start frame. That is to say, choosing which view your viewer will see by default in the player — in video editing this is referred to as choosing a poster frame. To set the start frame (ie, poster frame), simply drag the preview image until you reach the desired view you wish the Spinnable player to start with. As you drag the preview you will see the grey dot above the range slider shift its position.
Render
We now have the Range Sliders positioned to include every frame on both the horizontal and vertical axis — that’s all 168 views to be rendered. We also have a start frame selected so we can be confident that when we load the spinnable player in our browser it will start from the desired frame.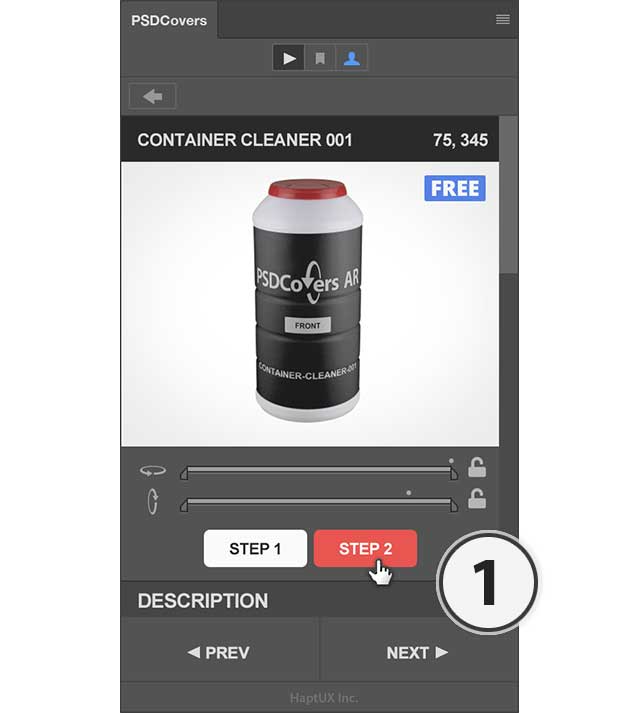
Rinse, Lather and Repeat
The next few options in the panel after clicking STEP 2 will perfectly mirror STEP’s 14 through STEP 18 above. If you need visuals to help walk you through the export process you can scroll up the tutorial and follow the instructions starting from STEP 14. Here are the settings we’ll apply to the following modals which appear…- Choose Web Player …
- Select 960×540 output resolution …
- Click Launch player to view results in the browser
Multiple Plane Spinnable 360°
After clicking Launch player in the panel you will see the following appear in your browser… click anywhere on the following product image and drag left, right, up or down to spin and rotate the view.Sharing Spinnable Players
All AR Mockups can be exported as a Spinnable product to be embedded into your website. Whenever you choose to export a spinnable product the panel will automatically render all 168 views with your design applied. When rendering is completed you will be left with an html page and image assets which can be shared with others. You can simply zip the HTML player and send it to your client or edit the HTML and embed the contents on your own site. Users with even a basic understanding of HTML will be able to embed the player on their own website. For a downloadable sample of our Spinnable Player please refer to the Tutorial Assets portion of this tutorial.MP4 Video Export
Create a 360° MP4 Video
The process for exporting a 360° video is very similar to creating a Spinnable Player, the first step is unlocking the horizontal or vertical Range Slider.
Do Not Unlock Both Range Sliders For Video Export
If both the horizontal and vertical Range Slider are unlocked then the panel will default to exporting a Spinnable Player — the option to generate a video will not appear in the export modal.
Define 360° Range (part 1)
With the Horizontal Range slider unlock we can pull apart the 2 halves of the slider and relocate them to either end of the Range Slider.
Define 360° Range (part 2)
Now lets complete the selection by dragging the left half of the Range Slider all the way to the left.
Begin Exporting 360° Video
We’re now ready to start exporting our 360° spinning video.
Similar to rendering a Spinnable Player we have to select the render style for our 360° video.
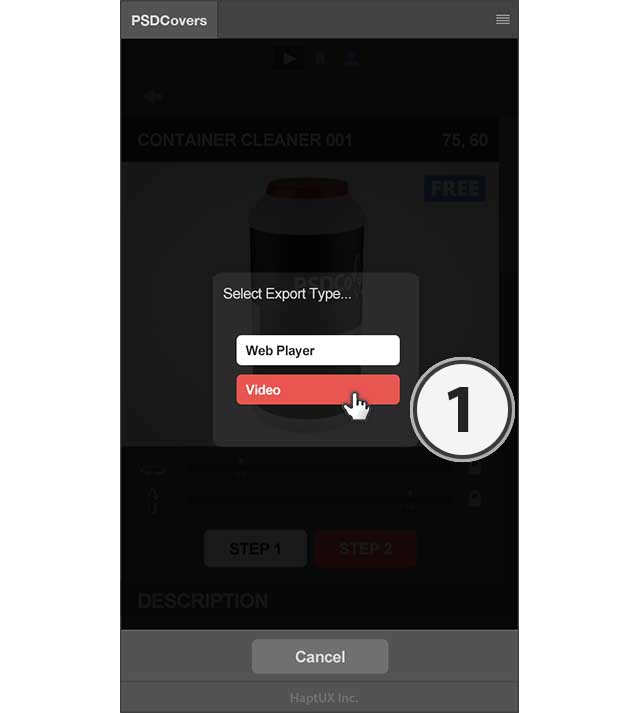
In this next step we are presented with an option to export our mockup as a Sipnnable Player or a Video.
 In this next step we need to define a resolution at which to export the video. Smaller resolutions will render faster but larger resolutions are better if you plan to scale or crop the videos down to a different resolution later.
The rendering process will now being and may require several minutes or more depending on the capabilities of your computer hardware.
In this next step we need to define a resolution at which to export the video. Smaller resolutions will render faster but larger resolutions are better if you plan to scale or crop the videos down to a different resolution later.
The rendering process will now being and may require several minutes or more depending on the capabilities of your computer hardware.
DO NOT INTERRUPT
Photoshop will be making heavy use of your clipboard as it copies and pastes your design from your template. It is recommended that this process be allowed to complete, do not switch apps otherwise you risk corrupting the clipboard with content from another app.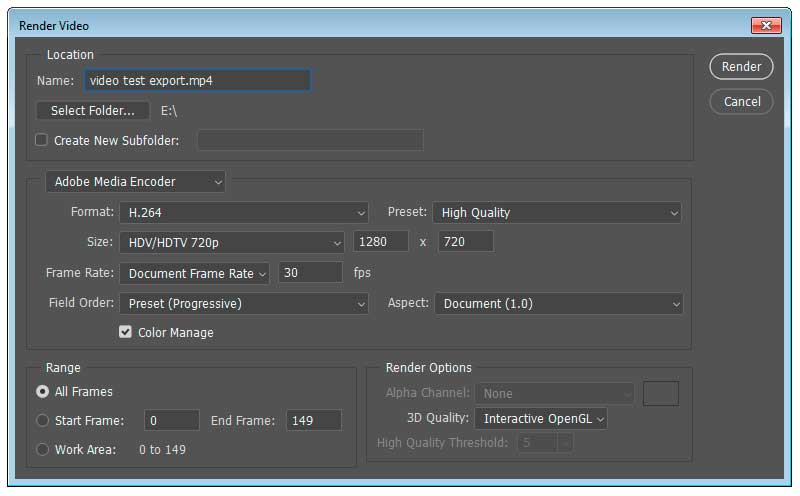 Exporting video is fairly straightforward — simply enter a name for your video and select a destination, then press Render. Understanding video formats, which encoder to use, video formats, field orders etc are left as an exercise for the designer to complete.
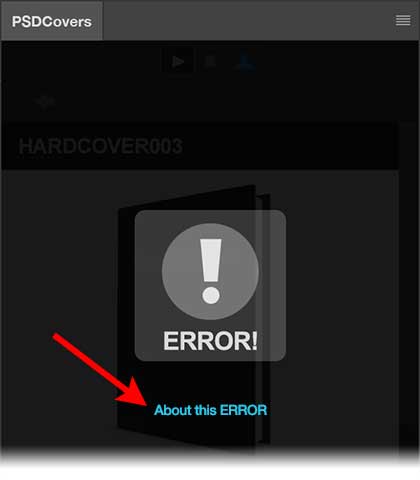
Helpful Errors
From time-to-time you may see an ERROR! modal with a hyperlink (see image on right)
Clicking the hyperlink will take you to our website where you can read about the error and how to avoid it in the future.