How It Works
Introduction
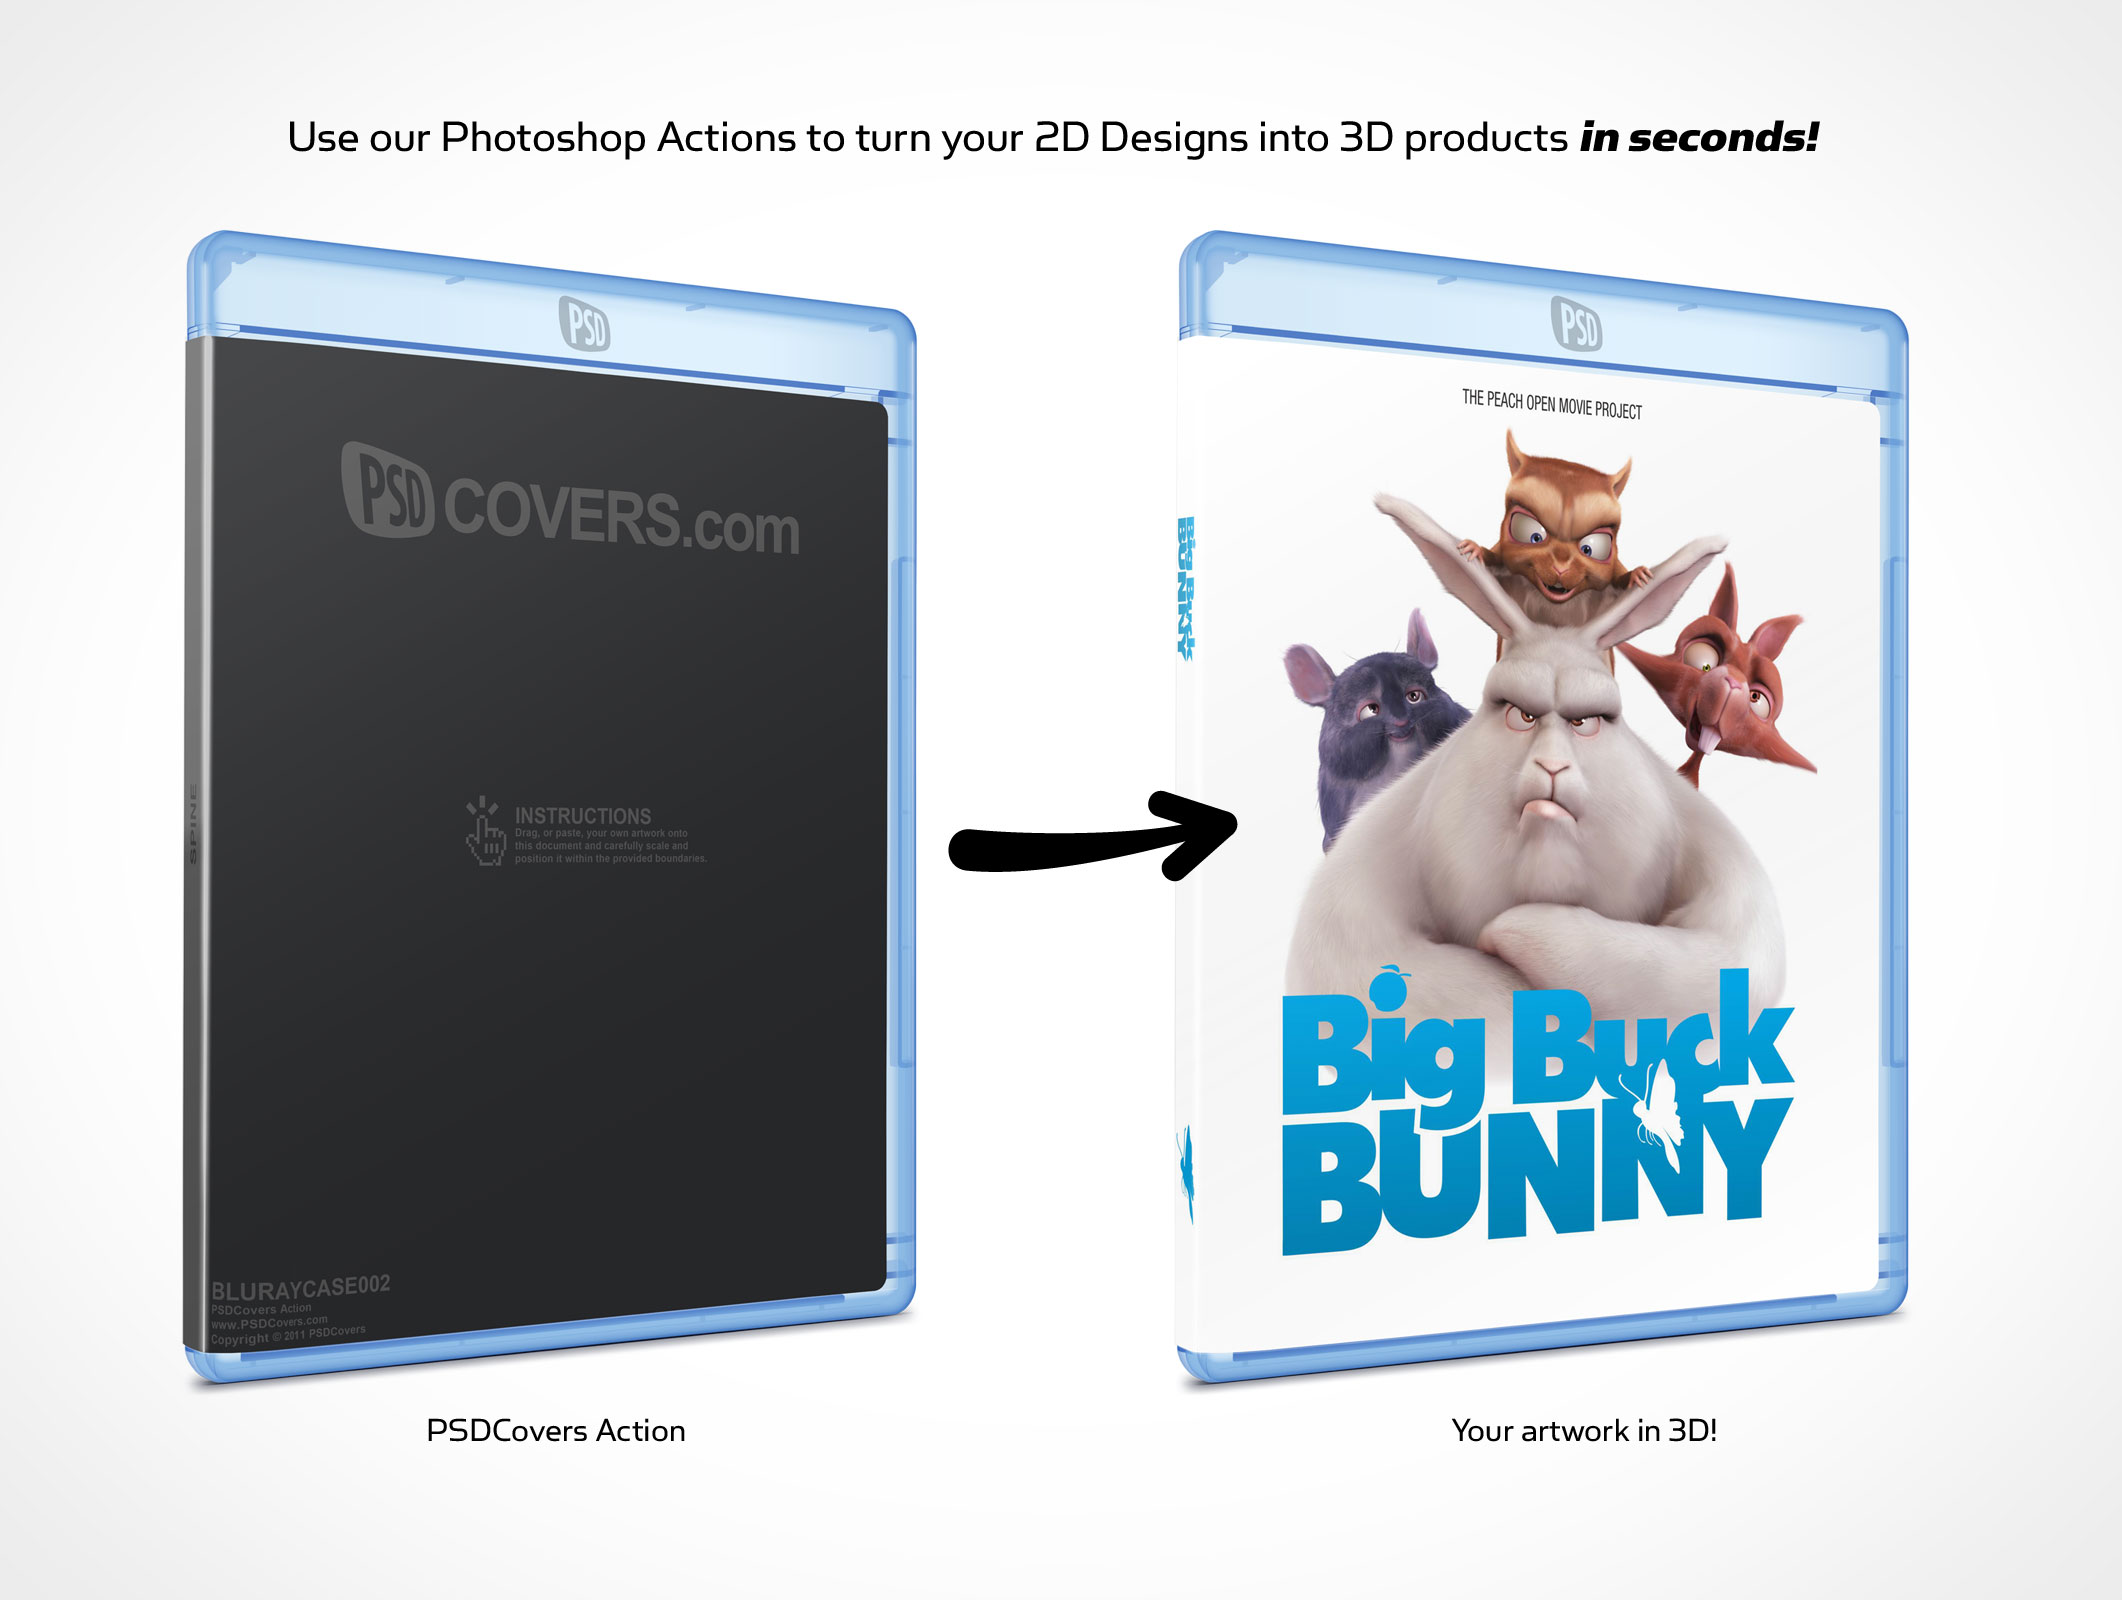
The following tutorial is representative of how to download and install any Photoshop Actions on this site.
How to find an action
For this tutorial we’re going to assume the viewer is interested in creating a BluRay DVD cover. Locating the BluRay on the site can be done through a site search, in this case we simply typed the location of the desired Photoshop Action directly into the URL field.
- Locate the desired Action

figure 01
Downloading an Action
Once the Action Details page is loaded, scroll down beneath the product mockup description under the featured image. Below the product description is a download button.
- Locate the Download button
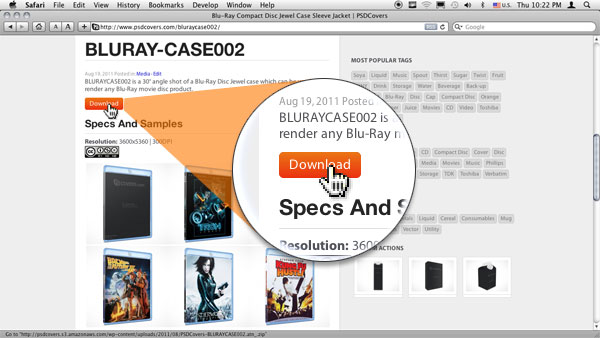
figure 02
Each post starts with a generic Action preview (dark grey). The name of the Action with the description and download button is located directly below the large preview. Scroll down the page until the download button comes into view.
Decompressing & Installing The Action
In order to use the Action within Photoshop it must first be extracted from the archive and then installed into Photoshop.
- To decompress the Action, simply double-click the archive or right-click and select your favorite utility to decompress it.
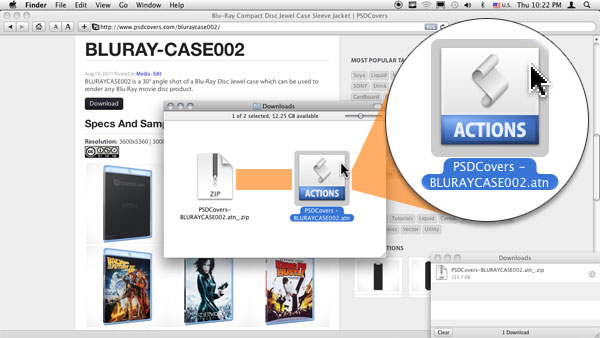
figure 03
After decompressing the archive, double-click the Action file to have it automatically installed in your Photoshop Actions palette. An in-depth tutorial on how to install actions can be found on this site.
- Installed Actions appear in the Photoshop Actions panel
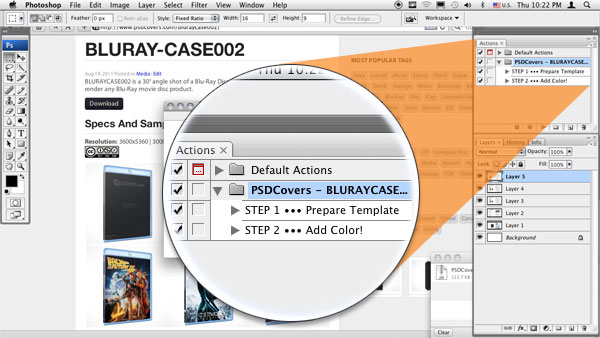
figure 04
Rendering The Mockup
Preparing The Template
Each Action comes as 2 parts, step 1 and step 2. The first step will render a template onto which instructions are placed for you to follow. Areas of the template are coloured with either dark grey or light grey, these areas are the boundaries in which your 2D design needs to be positioned and scaled to fit. In the case of this BluRay there are 3 areas that need to be filled. The first area is the BluRay logo which is not part of the Action (no copyrighted content is shipped with our Actions).
So if you need the BluRay logo or want your own logo rendered at the top of the box then you will need to replace the PSD graphic at the top of the template with your own. The next area is the spine of the BluRay followed by the cover of the BluRay case.
Before rendering the mockup we need to prepare the required template — the template ensures that your design fits the dimensions and size expected by STEP 2.
- Select STEP 1 and click the playback button
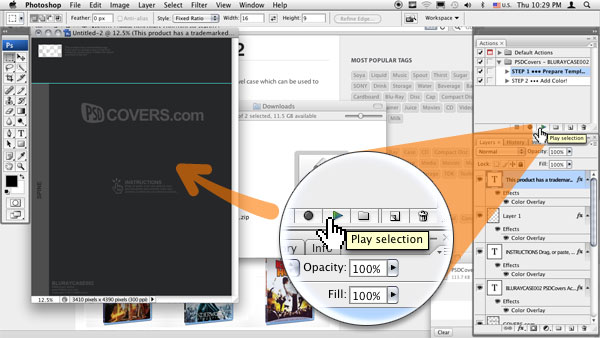
figure 05
Add your 2D Artwork
Locate your artwork on your desktop and load them into Photoshop.
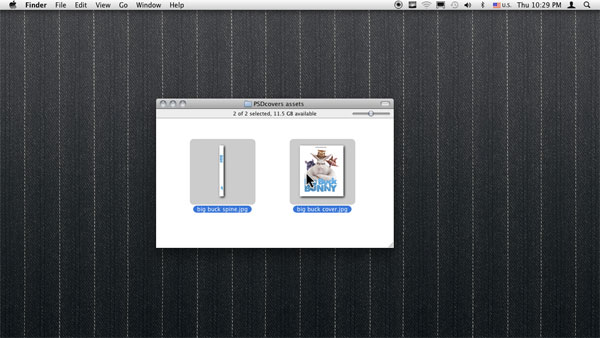
figure 06
Position And Scale The 2D Artwork
The BluRay template has 3 areas that need your 2D artwork to occupy fully in order to get a proper rendered result. For the moment we’ll stick with the PSDCovers logo and focus on the artwork for the spine and cover for the BluRay case. Paste or drag the 2D artwork you have for the spine onto the template and position and scale it until it fits only the area reserved for the spine.
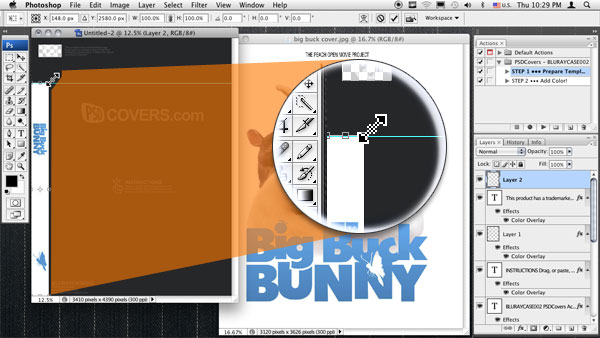
figure 07
As with the spine, get your 2D design for the front of the case into the template and scale and position it until it fits the entire provided area. Don’t worry too much if your design is initially too small, high, wide etc. Not every design is going to fit perfectly because not every BluRay case is identical and neither are the printed covers for the same case designs.
Fudge the fit, it’ll work fine. Be careful not to cover your spine design in the process. If you’re familiar with masks then using those when laying out your 2D design on the template will help avoid overlap issues.
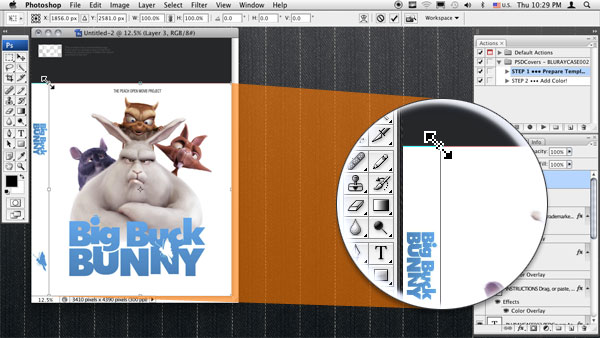
figure 08
Rendering Your Mockup
With your design all laid out you’re now ready to render your 2D artwork as a 3D BluRay case.
- Return to the Actions palette, select Step 2 and click the “play selection” button.
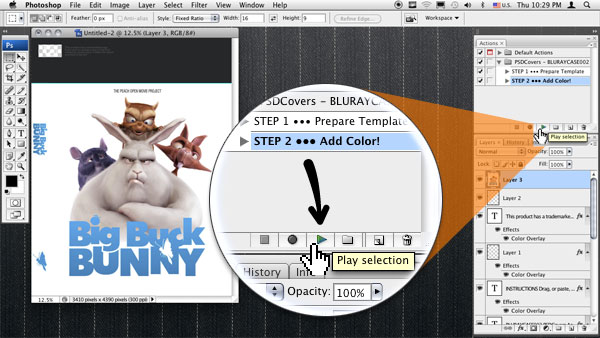
figure 09
Your 3D Product Shot
Providing you own the rights to the 2D design you’ve rendered with this Action, then the resulting image is yours to do with as you wish. All Actions are non-exclusive meaning that you might see someone else use the exact same product shot or layout as yours, but as long as the artwork is different you should have something unique.
All the layers which are created during the rendering process remain intact allowing you to further customize highlights and shadows to your liking.
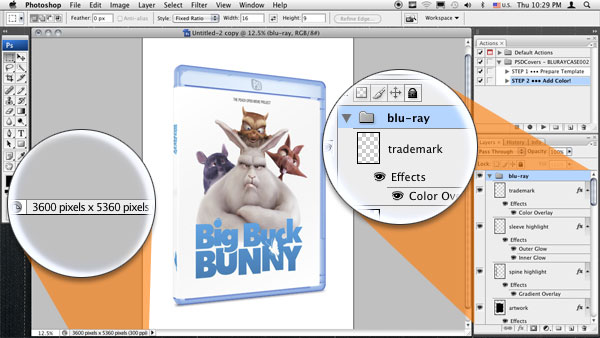
figure 10
Composition (optional)
Going a step further, you can combine multiple Actions with your artwork into custom compositions that suit your needs.

figure 11
Conclusion
Every Action works the exact same way. Find a product shot you need, render and fill the template with your own artwork, then run the final render process. The Actions on this site are meant to get you closer to your goal of creating a 3D layout for a project, marketing presentation or whatever your case may be.

